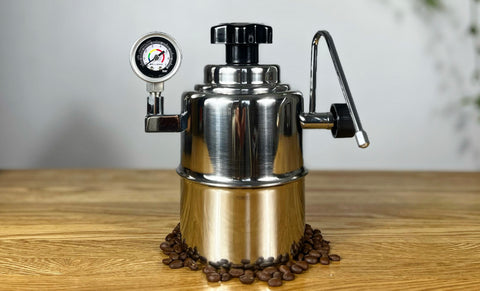
With the recent introduction of the New Bellman Stovetop Steamer with a Pressure Gauge we thought there's no better time to give you the best guide for steaming milk. The Bellman Stovetop Steamer is the perfect product for someone who wants to create that silky, foamy and textured milk without having to splurge out on an expensive coffee machine.
Outlined below will be a step-by-step guide to producing perfectly textured milk to go with with your Espresso, Moka-Pot Brew or even Hot Chocolate! Made from Grade 303 Stainless steel the Bellman Steamer can be used on all types of kitchen hobs, whether that's induction, electric, or gas.
How to Steam your Milk with the Bellman Stovetop Steamer
Preparing and Heating your Steamer
-
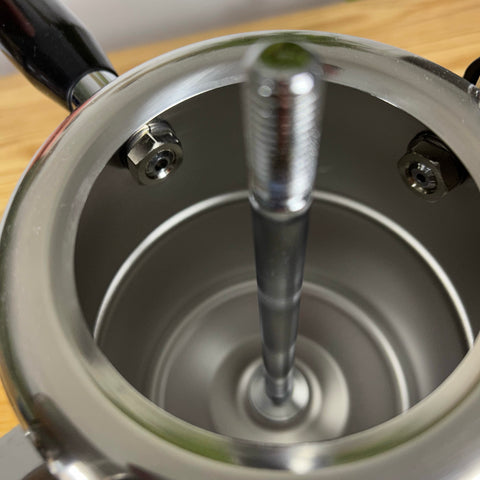
Start by filling your Bellman's water chamber with freshly boiled water up to the centre rim. Do not fill higher than this as it will potentially interfere with the safety valves. (By using freshly boiled water you will reduce the time it takes for the steam to build up inside).
- Turn on your heating appliance and put it on a medium-high heat.
-
If you are using the New Bellman Stovetop Steamer, Standard Steamer, or even one of the Bellman Coffee Makers judging when the steam element is ready for use will vary depending on the model.
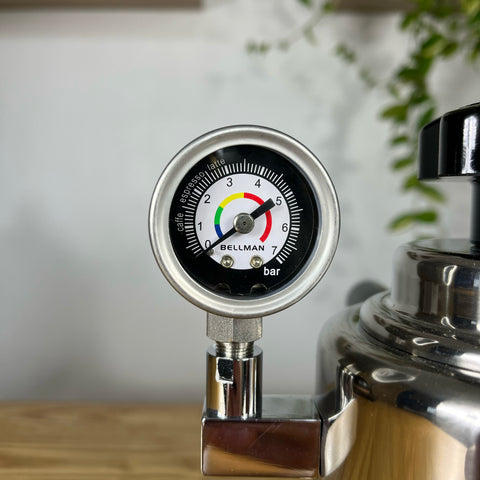 Those with the Pressure Gauge will find it easier to judge as you will be able to see the needle gradually move as the pressure builds. A general rule when heating the bellman up is to have the steam wand valve fractionally open so you can hear the pressure building.
 - To check whether the Steamer is ready to start, open the valve and listen for the sound of air passing through the wand. If there is none or only very little then you should leave your steamer to build up pressure for a few more minutes. The time it takes to for the steamer to reach optimum temperature will vary depending on your heating appliance. The more you steam the more you will begin to learn how long each part takes!
Steaming your Milk
- Once your Bellman has reached the optimum temperature, that is when the steam wand is pushing air through consistently, you are ready to froth.
- Purge the wand into a wet cloth or drip tray by fully opening and then closing the valve to allow any condensation and/or milk residue to be removed.
- Pour fresh cold milk into a stainless steel milk pitcher no more than 60% full as it will expand quickly once you begin to add air. We recommend even less than this whilst you're getting acquainted with frothing.
- Turn your heating appliance to a low-medium heat to allow the continuous but steady build up of steam inside the bellman.
-
Bring your milk pitcher up to the steam wand so that the tip of the wand is just below the surface of milk and open the valve gradually until it is fully open.
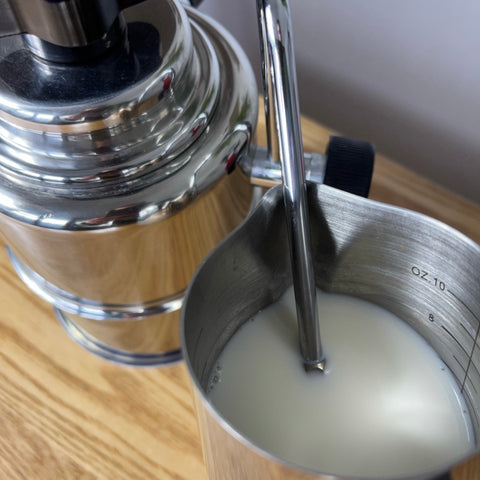
- The aim at this stage is to add air into the milk so that you create that nice aerated foam that you find on top of your favourite coffee drinks. Whilst your milk will begin to be heated this is not the primary focus at this stage.
- As the air is pushed through the milk you should hear a whooshing sound and it should begin to increase in volume. As the milk expands you should keep the steam wand just below the surface of the milk by gradually lowering the pitcher.
- Before the milk pitcher has become too hot to touch and when the milk foam has increased to your desired volume, you should go ahead and lower the wand further into your milk so to begin the heating process.
- You should know when the milk is at the right temperature as the jug will become too hot to touch. When this is the case you should heat your milk for a further few seconds then close off the steam valve and remove the wand from the milk.
- Place the Milk pitcher to one side to allow the larger bubbles to disappear.
- With a wet cloth wipe and purge the steam wand to remove any milk build up from inside.
Preparing your Milk
- If there are still some big bubbles left then tap the pitcher on the side a few times so that the milk is shaken off causing them to burst.
-
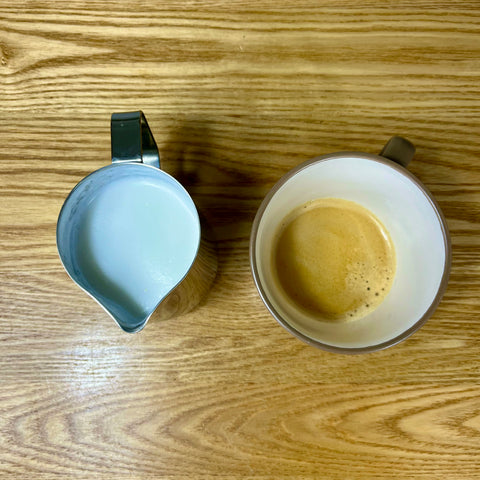
Depending on what drink you are preparing will determine what you do next. Typically, for your standard coffee drinks you would swirl the coffee pitcher to mix your milk foam and heated milk together to create that silky smooth milk texture. If you want to keep the milk and foam separate then you can skip this stage. You should get a glossy texture as seen in the photo on the right.
- Pour your milk into your desired drink and begin creating that beautiful latte art!
We'd love to see your wonderful latte creations using the Bellman Stovetop Steamers or Bellman Coffee Makers so tag us or DM us on our Instagram